Saturday, July 12, 2008

Corpulent the Abomination

Corpulent is a disgusting assemblage of corpses; even its allies sometimes despise the stench that follows. The Abomination is able to eat and digest units alive, adding to its own power. It also has the ability to infect enemies with a particularly infective strain of disease, causing not only the target to suffer, but those who pass by him as well. Corpulent has little regard for its own well being - it was seen by a High Elf scouting force to spit out an entire corpse, perhaps one from the Abomination's own innards, and with such force to immediately knock out his adversary. Since then they have learned to avoid this odious thing.

Stats
Affiliation: Demons
HP: 717
Mana: 168
Primary: Strength
Str: 27 + 3.1
Agi: 16 + 1.6
Int: 12 + 1.3
Range: 128
Speed: 295

The Abomination has an extraordinary amount of starting health, in fact, the highest of all heroes, and also a high strength gain. He can eat units to increase his strength further. It is recommended to buy a mana item for the early game since he does have 3 active abilities to use with not a lot of mana (although the mana costs are not particularly high).


Consume [C]
Consumes an enemy unit, digesting it slowly at the rate of 50 health per second. If the Abomination is killed while consuming, the consumed unit will be released. If the consumed unit had the Epidemic debuff, the Abomination will heal from consuming. Upon fully consuming a unit, the Abomination will gain 1 strength. Does not work on heroes or creeps above level 6.

Level 1 - 5 hp/sec heal
Level 2 - 10 hp/sec heal
Level 3 - 15 hp/sec heal
Level 4 - 20 hp/sec heal
Level 5 - 25 hp/sec heal

Cooldown: 90/75/60/45/30
Mana Cost: 150/120/90/60/30

Consume is a very appetizing ability, but experienced players will wait until this is at a higher level to use. Firstly it has a high mana cost at lower levels, and the Abomination does not start out with much mana in the first place, and secondly, the cooldown is too long to use on a regular basis. And in the early game, it is more important to stay alive and harass opponents in your lane anyways; Epidemic is often the first choice among Abomination players. However, Consume can be powerful in the late game since the Abomination can easily build up strength.


Epidemic [E]
Infects the target unit with an epidemic, dealing damage over time. If one of the infected unit's allies comes in close contact with it, the ally will also become infected and can in turn infect other allies. Lasts 9 seconds.

Level 1 - 9 damage per second
Level 2 - 18 damage per second
Level 3 - 27 damage per second
Level 4 - 36 damage per second
Level 5 - 45 damage per second

Cooldown: 18
Mana Cost: 75

The skill that the Abomination is known for, Epidemic is a great early game hero harassing ability that still retains power in the late game against large creep waves. This is especially deadly if the opponent does not know how Epidemic works! Beginners have often died to a single cast of a level 1 Epidemic, because they stay right next to an infected unit, and right as the buff would have worn off, they are reinfected due to staying too close. When you are infected, you should run to a less crowded area, preferably to the side of your lane, away from your own creeps. This is how ranged heroes should respond, but melee heroes should just stay back and try not to become infected.


Putrid Odor [P]
Slows nearby enemies' attack and movement speeds in a 300 aoe. Also causes already-infected units in this range to become reinfected with Epidemic.


Level 1 - 5% slow
Level 2 - 10% slow
Level 3 - 15% slow
Level 4 - 20% slow
Level 5 - 25% slow

Putrid Odor is similar to the Firelord's Exhaustion ability, although with a smaller area and a more dramatic slow. This skill is also useful for its Epidemic reinfecting effect, allowing the Abomination to keep his opponents infected by walking near them. Unfortunately this cannot be used to infect normal, healthy units, but the slow effect does help the Abomination chase. Expert players tend to max Epidemic first.


Regurgitate [R]
The Abomination launches a heap of flesh at a target unit, causing damage to himself and to his opponent. This launch stuns the target for a short time and also infects or reinfects it with Epidemic.

Level 1 - 300 to self and target, 2 sec stun
Level 2 - 450 to self and target, 2.5 sec stun
Level 3 - 600 to self and target, 3 sec stun
Level 4 - 750 to self and target, 3.5 sec stun

Cooldown: 120
Mana Cost: 100/150/200/250

A recent addition, this ability essentially damages the Abomination by ejecting a piece of rotting flesh from it, which then hits a target unit, damaging and stunning it. In order to not suffer so much from the self inflicted damage, it is recommended that the player buy extra health items or use Epidemic on a nearby creep and promptly Consume it, as eating it will heal the Abomination. This can be used as both a chasing and finishing move, because even if it leaves the target with a few health, the Epidemic effect will soon destroy it. This is yet another reason to max Epidemic first.

v0.87 Hero Statistics

Ranks in these lists do not factor in items or abilities; however, stat bonuses are included at level 29 statistics. In case of tie, heroes in the tie will be ranked in no particular order. Thanks to KavuChameleon for providing the spreadsheet!

Top Tens

Strength per Level

1. Sludge King (+4.0)
2. Doom Guard (+3.3)
3. Ogre Warlord (+3.2)
4. Pit Lord (+3.2)
5. Abomination (+3.1)
6. Bandit (+3.0)
7. Jungle Stalker (+3.0)
8. Grunt (+2.9)
9. Mountain Giant (+2.9)
10. Death Knight (+2.6)

Agility per Level

1. Warden (+3.2)
2. Spell Breaker (+2.9)
3. Naga Warrior (+2.9)
4. Gnoll Assassin (+2.9)
5. Gargoyle (+2.8)
6. Raider (+2.8)
7. Zergling (+2.8)
8. Harpy Stormwitch (+2.8)
9. Dark Ranger (+2.7)
10. Troll Batrider (+2.7)
11. Helicopter (+2.7)

Intelligence per Level

1. Demolitionist (+3.4)
2. Skeletal Mage (+3.3)
3. Void Walker (+3.3)
4. Archmage (+3.3)
5. Banshee (+3.2)
6. Faerie Dragon (+3.2)
7. Druid of the Talon (+3.2)
8. Storm Panda (+3.0)
9. Tree Goddess (+3.0)
10. Tuskarr Mage (+2.9)
11. Satyr Thundercaller (+2.9)
12. Medicine Man (+2.9)

Total Stats per Level

1. Faerie Dragon (+6.7)
2. Archmage (+6.6)
3. Spell Breaker (+6.5)
4. Demolitionist (+6.5)
5. Doom Guard (+6.4)
6. Far Seer (+6.3)
7. Warden (+6.3)
8. Druid of the Talon (+6.3)
9. Chaos Peon (+6.3)
10. Void Walker (+6.2)

Level 29 Damage *(not including dice)

1. Sludge King (178)
2. Void Walker (161)
3. Archmage (156)
4. Skeletal Mage (155)
5. Faerie Dragon (155)
6. Ogre Warlord (154)
7. Doom Guard (154)
8. Banshee (154)
9. Pit Lord (153)
10. Druid of the Talon (153)
11. Abomination (153)

Level 29 Attack Speed *(cooldown in seconds)

1. Warden (0.74)
2. Naga Warrior (0.75)
3. Zergling (0.76)
4. Gnoll Assassin (0.76)
5. Gargoyle (0.77)
6. Spell Breaker (0.77)
7. Harpy Stormwitch (0.77)
8. Raider (0.77)
9. Troll Batrider (0.77)
10. Dark Ranger (0.78)
11. Helicopter (0.78)
12. Mutation (0.78)

Level 29 DPS *(Damage per second)

1. Warden (205.18)
2. Naga Warrior (194.09)
3. Zergling (189.74)
4. Spell Breaker (185.44)
5. Raider (181.18)
6. Mutation (176.96)
7. Gnoll Assassin (174.46)
8. Gargoyle (172.38)
9. Troll Batrider (168.24)
10. Harpy Stormwitch (168.24)

Level 29 HP

1. Sludge King (3468)
2. Ogre Warlord (2964)
3. Doom Guard (2964)
4. Pit Lord (2943)
5. Abomination (2943)
6. Jungle Stalker (2769)
7. Bandit (2775)
8. Mountain Giant (2754)
9. Grunt (2733)
10. Death Knight (2565)

Level 29 Armor

1. Warden (14.1)
2. Naga Warrior (13.6)
3. Zergling (13.4)
4. Spell Breaker (13.2)
5. Raider (13.0)
6. Mutation (12.8)
7. Knight (12.1)
8. Hippogryph (12.0)
9. Earth Revenant (12.0)
10. Desert Advocate (12.0)
11. Blood Fiend (12.0)

Level 29 EHP (Effective Hit Points, includes armor)

1. Ogre Warlord (4725)
2. Abomination (4709)
3. Sludge King (4654)
4. Jungle Stalker (4574)
5. Pit Lord (4568)
6. Doom Guard (4529)
7. Grunt (4520)
8. Mountain Giant (4473)
9. Bandit (4424)
10. Knight (4282)

Level 29 Mana

1. Void Walker (1974)
2. Archmage (1904)
3. Faerie Dragon (1890)
4. Skeletal Mage (1890)
5. Banshee (1876)
6. Druid of the Talon (1862)
7. Demolitionist (1820)
8. Storm Panda (1806)
9. Tree Goddess (1778)
10. Satyr Thundercaller (1750)
11. Medicine Man (1750)

Level 29 Battle Power (DPS times EHP)

1. Raider (718,839)
2. Warden (693,143)
3. Ogre Warlord (685,467)
4. Spell Breaker (684,870)
5. Sludge King (684,538)
6. Abomination (682,528)
7. Naga Warrior (667,235)
8. Mutation (664,544)
9. Jungle Stalker (653,782)
10. Grunt (643,012)


Bottom Tens

Strength per Level

1. Tree Goddess (+1.2)
2. Skeletal Mage (+1.3)
3. Skinkapulter (+1.4)
4. Rifleman (+1.4)
5. Gnoll Assassin (+1.4)
6. Huntress (+1.4)
7. Zergling (+1.5)
8. Harpy Stormwitch (+1.5)
9. Helicopter (+1.5)
10. Merchant (+1.5)
11. Tuskarr Mage (+1.5)
12. Troll Beserker (+1.5)
13. Warden (+1.5)
14. Elven Hunter (+1.5)
15. Demolitionist (+1.5)
16. Flame Contraption (+1.5)
17. Banshee (+1.5)

Agility per Level

1. Sludge King (+1.0)
2. Storm Panda (+1.0)
3. Banshee (+1.3)
4. Satyr Thundercaller (+1.3)
5. Skeletal Mage (+1.3)
6. Void Walker (+1.3)
7. Shadow Lich (+1.3)
8. Doom Guard (+1.3)
9. Tree Goddess (+1.3)
10. Paladin (+1.3)
11. Pit Lord (+1.3)

Intelligence per Level

1. Sludge King (+1.0)
2. Raider (+1.1)
3. Dryad (+1.2)
4. Grunt (+1.2)
5. Footman (+1.2)
6. Hippogryph (+1.2)
7. Gnoll Assassin (+1.2)
8. Naga Warrior (+1.2)
9. Ogre Warlord (+1.2)
10. Troll Beserker (+1.3)
11. Abomination (+1.3)
12. Rifleman (+1.3)
13. Jungle Stalker (+1.3)
14. Blood Fiend (+1.3)

Total Stats per Level

1. Rifleman (+4.9)
2. Hippogryph (+5.2)
3. Troll Beserker (+5.3)
4. Master of the Hunt (+5.3)
5. Nerubian Lord (+5.5)
6. War Golem (+5.5)
7. Necromancer (+5.5)
8. Shaman (+5.5)
9. Druid of the Claw (+5.5)
10. Gnoll Assassin (+5.5)
11. Shaman (+5.5)
12. Dryad (+5.5)

Level 29 Damage *(not including dice)

1. Ghost (105)
2. Merchant (107)
3. Nether Dragon (109)
4. Druid of the Claw (111)
5. Meat Wagon (111)
6. Rifleman (114)
7. Crypt Lurker (114)
8. Eredar Diabolist (114)
9. Nerubian Lord (114)
10. Shaman (117)

Level 29 Attack Speed *(cooldown in seconds)

1. Sludge King (1.21)
2. Storm Panda (1.17)
3. Paladin (1.14)
4. Doom Guard (1.13)
5. Tree Goddess (1.13)
6. Shadow Lich (1.13)
7. Satyr Thundercaller (1.12)
8. Void Walker (1.12)
9. Banshee (1.12)
10. Skeletal Mage (1.10)
11. Pit Lord (1.10)
12. Sorceress (1.10)

Level 29 DPS

1. Druid of the Claw (108.66)
2. Necromancer (112.08)
3. Obsidian Statue (112.74)
4. Paladin (113.58)
5. Warlock (113.99)
6. Shaman (115.15)
7. War Golem (115.52)
8. Alchemist (115.88)
9. Eredar Diabolist (116.40)
10. Spirit Walker (116.54)
11. Polar Furbolg Shaman (116.54)

Level 29 HP

1. Tree Goddess (1578)
2. Skeletal Mage (1620)
3. Skinkapulter (1683)
4. Huntress (1704)
5. Elven Hunter (1746)
6. Troll Beserker (1746)
7. Rifleman (1746)
8. Zergling (1746)
9. Gnoll Assassin (1767)
10. Flame Contraption (1767)
11. Harpy Stormwitch (1767)
12. Merchant (1767)
13. Helicopter (1767)

Level 29 Armor

1. Storm Panda (4.3)
2. Skeletal Mage (5.2)
3. Druid of the Talon (5.4)
4. Hematologist (5.7)
5. Sludge King (5.7)
6. Shadow Lich (5.8)
7. Tree Goddess (5.8)
8. Warlock (5.9)
9. Arcane Wizard (5.9)
10. Demolitionist (5.9)
11. Void Walker (5.9)
12. Satyr Thundercaller (5.9)

Level 29 EHP

1. Skeletal Mage (2125)
2. Tree Goddess (2127)
3. Flame Contraption (2403)
4. Banshee (2432)
5. Void Walker (2449)
6. Tuskarr Mage (2453)
7. Druid of the Talon (2506)
8. Shaman (2507)
9. Holy Priest (2515)
10. Sorceress (2522)

Level 29 Mana

1. Raider (868)
2. Footman (910)
3. Hippogryph (924)
4. Naga Warrior (924)
5. Dryad (938)
6. Gnoll Assassin (952)
7. Ogre Warlord (952)
8. Sludge King (952)
9. Abomination (952)
10. Jungle Stalker (952)

Level 29 Battle Power

1. Tree Goddess (276,484)
2. Shaman (288,662)
3. Skeletal Mage (298,233)
4. Shadow Lich (300,087)
5. Ice Troll Priest (304,503)
6. Flame Contraption (305,070)
7. Necromancer (306,056)
8. Holy Priest (308,027)
9. Sorceress (316,863)
10. Storm Panda (331,420)

Attributes

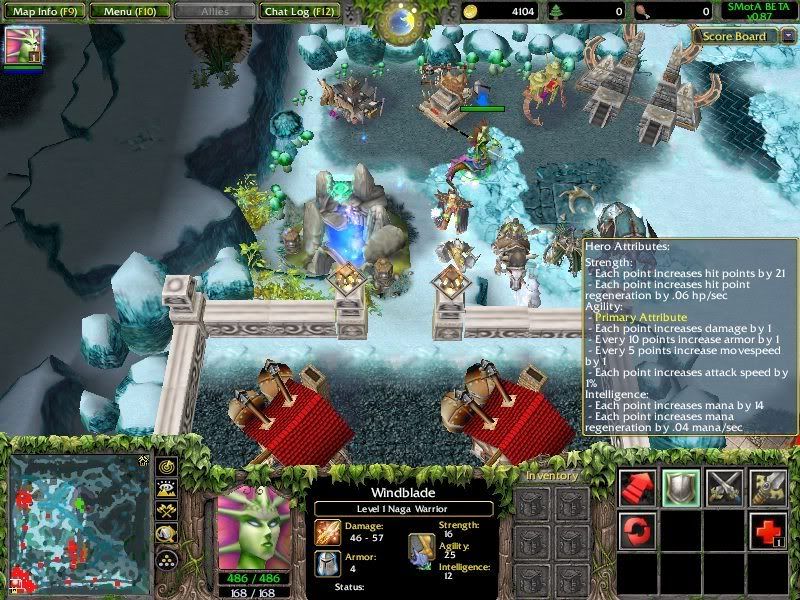
Strength, agility, and intelligence are some of the most common terms to exist in the Warcraft III vocabulary. What effects does each one have in SMotA?


(Clicking on this picture will automatically zoom in on it.)

Strength

Each point of strength adds 21 hp, 0.06 hitpoint per second regeneration, and also 1 damage if strength is your primary attribute. In SMotA, strength is useful more for the hitpoints and not the regeneration. That said, 100 strength will provide a sturdy 6 hp/sec regeneration, but isn't the 2100 hp a bit more prominent?

If you need some hp, buy some strength items; a Maul of Strength provides 10 strength, while the Horn gives 25. Also, Essence of Aszune/Heart of Searinox/Soul Core provide not only strength but bonus hp, hp regen, and give a healing ability. However, these are much more costly and should be reserved for strength heroes.

Agility

Each point of agility adds 1% attack speed, 0.1 armor, 0.2 movespeed, and of course 1 damage if agility is your primary attribute. The attack speed and armor are typical of most AoS maps, but the 0.2 movespeed is powerful as well. This will cause every 5 agility to add 1 movespeed, which doesn't seem a lot at first, but this adds up quickly; 100 agility will add 20 movespeed, not to mention the 100% attack speed and 10 armor. Having high agility also allows many heroes to go from near max speed to the max speed of 522, at least temporarily with the help of speed boosting abilities.

Item-wise, Bloodfeather's Heart and Key of Agility, which provide 10 and 25 agility respectively, are good for building agility. Also, the Curve Bow/Windbow series, although costly, can add much agility and other effects.

Intelligence

Each point of intelligence adds 14 mana and 0.04 mana per second regeneration, also 1 damage if intelligence is your primary attribute. A must in the early game, this attribute actually becomes less significant as the game draws on because most heroes will have sufficient mana pools to cast their spells over and over again.

However, the intelligence heroes often have highly mana intensive ultimates, and if they also use certain items like the Thunderlizard Diamond, they must be prepared to invest more into intelligence. For example, even with a maxed out Attribute Bonus, a level 29 Warlock has 1414 mana total, yet his ultimate alone costs 850. Enemies can use the Sphere of Ignorance orb to counteract this, and the Warlock must get additional mana. The Ring of the Archmagi/Mindstaff/Gloves of Magic are perfect items for this; the Gloves of Magic adds 1260 mana total, as well as many other powerful bonuses. For a cheaper remedy, the Ring of the Mind and the Scepter of Intelligence add 10 and 25 intelligence respectively.

Friday, July 11, 2008

Observatories

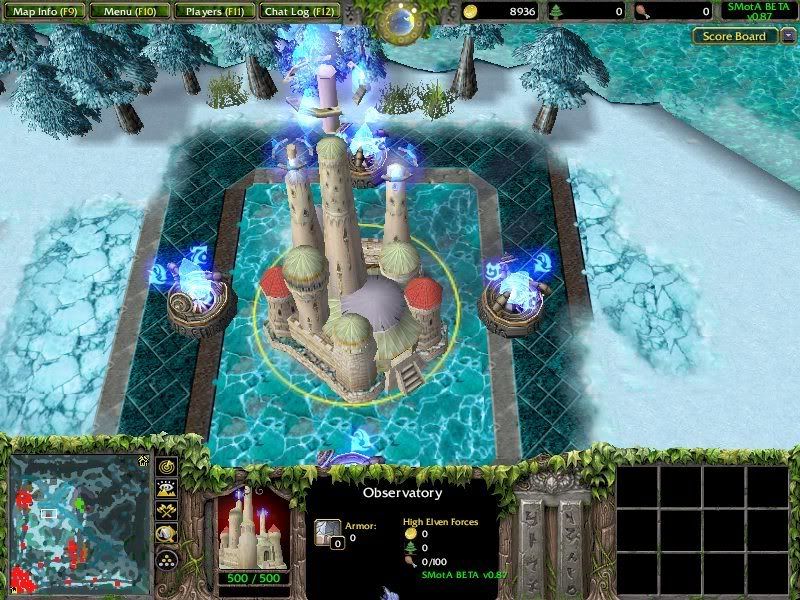
In SMotA players can capture Observatories that grant enormous scouting advantages. Many beginners do not know what they are, and even intermediate players do not know when to take, or not to take an Observatory. First let us look at some facts regarding them:

Number of Observatories: 2
Observatories per team at the start: 1
Hitpoints: 500
Armor: 0, Fortified
Sight radius: 5000 4000
Truesight radius: 1000
Gold given when captured: 150
HP after capturing: 250 (or 50%)
HP regeneration: 2 per second

Ok, 5000 sight range sounds like a lot. But exactly how much? (In the current version the range is 4000; the pictures below are invalid.)


Note carefully that in the minimap, you can see a large circle of vision where everything around it is dim. That is the sight given by the Observatory!

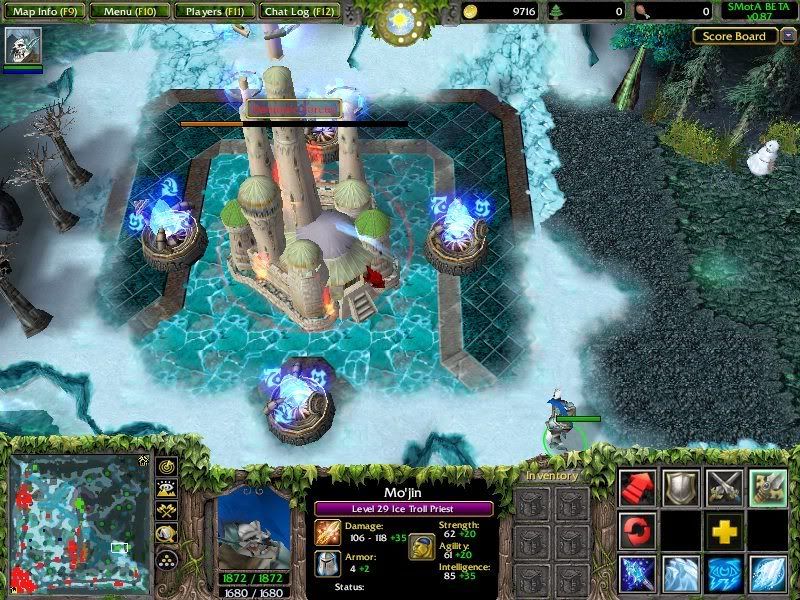
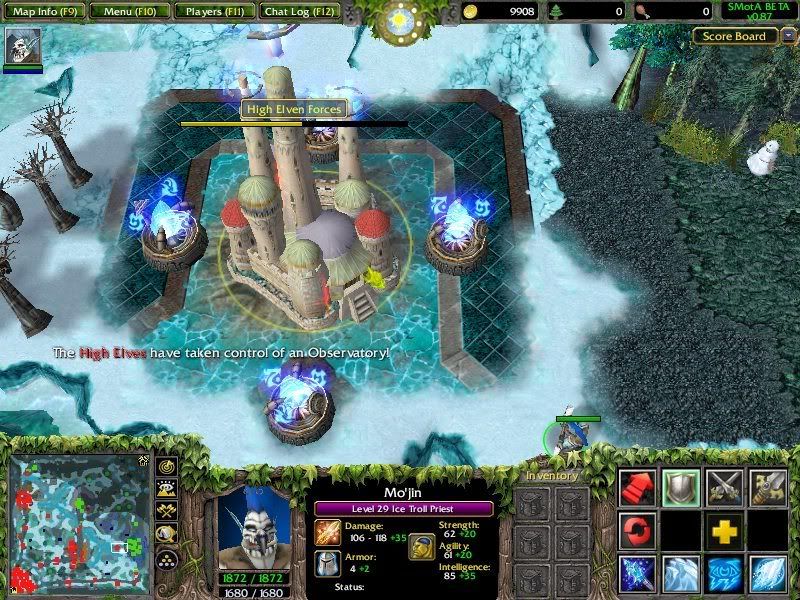
SMotA has a simple method of capturing Observatories (and Outposts as well, but we will get to that in another section). Simply reduce its hitpoints to zero, and it will switch its allegiance! However, it is possible to deny them; when you land the final blow on your team's Observatory, it will remain under your team's control.


After capturing an Observatory, it will be reset to half-hp and begin self-repairing from there. This is to make captures in the early game not take so long; at the same time, some heroes with certain abilities will be able to take out a freshly captured Observatory in one hit, making them very difficult to defend.


Tips

The point of Observatories is to give the controlling team much enhanced sight, and also to give the map even more of a "territorial" feel, especially combined with the Outposts. The team controlling the nearby Observatory can easily set up ganks, and just as easily avoid them. They can also serve as a fighting ground against invisibility heroes, since Observatories do have a 1000 aoe Truesight. However, many of these invisibility heroes can simply capture the Observatory themselves and use it against you!

Observatory Rush

A common strategy by advanced players is the Observatory Rush. As the name suggests, the player will pick a hero, buy some starting items, then immediately use one of the Teleporters and head for the enemy Observatory with the idea of capturing it before the first creep wave. Heroes with a summon at level one, e.g. Skink, Druid of the Talon, etc., can use their summon to help bring down the Observatory's hitpoints. If the opponent's team is caught off-guard with all of their heroes still in the base, then the Observatory can usually be taken.

However, in the case where a hero or two are sent to defend, a battle can occur as early as level one, usually to the victory of the defenders. But sometimes the offense sends in two, three, or even five heroes to get the Observatory, then scramble to their lanes. The defensive side normally has to concede the Observatory for at least the first five minutes of the game, because if a hero goes to recapture it, they will be losing out on precious experience in the lane (newbies often fall for this trick). This early attack guarantees a sight advantage and also a slight monetary one, since the player who last-hit the Observatory will have 150 extra gold!

In fact, if the attack occurs extremely early, and the other team does not defend, one hero can go in, capture the Observatory, run back to a Teleporter, buy an item with the extra gold, then teleport back in the lane just in time for the first creep wave to meet. However the player has to be really quick and know where the Teleporters are in order to pull this off.

Summoned Units

A number of heroes can summon attacking units, normally to assist in combat. However, most summons are also great for capturing Observatories, especially in the early game, since the hero can stay in the lane farming experience, while the summoned unit engages in a one-sided battle against an Observatory. The downside is that because summons are generally much weaker than heroes, a defending hero can normally defend the Observatory from capture. But that also means you can have more experience from farming in your lane. In the late game, summons can be put to better use since the hero should be able to run quickly with Boots to the Observatory, take it down in a few hits, then run back to the lane with 150 extra gold.


Observatory vs. Outpost

Often in the heat of the middle and late game, players have to make short term decisions on whether to capture a certain Outpost or an Observatory. My suggestion is if you can, take both. And if you can't, it is often a choice in which the correct action depends on the situation. Observatories have less hitpoints and are undefended, but are further from Teleporter exits. So if you think there are nearby enemies, go for the Observatory, since immediately after capturing it you will be able to see anyone nearby. Taking an Outpost has a larger impact on the game, but if a hero shows up and forces a fight in front of his Outpost tower, then you are at a disadvantage.

Neutrals

Both Observatories are within walking distance of neutral creep camps, which provide excellent farming opportunities. The bad news is that while farming, your outpost may be captured and the enemy will know exactly where you are. However, the good news is that you will be able to see him coming from a mile away before he even gets near the Observatory.
Latest version available for download at The Hive Workshop.